
Hey there,
It’s Lui, and I’m back with another edition of the 🧭Microsoft 365 Compass🧭 Newsletter! In this edition, I’m diving into a super useful feature in SharePoint Lists—calculated columns—and specifically, how you can use text manipulation formulas like LEFT(), RIGHT(), and MID() to extract and format data dynamically.
If you’ve ever needed to clean up text values in a SharePoint List, extract key details from a field, or automate simple text transformations without Power Automate or PowerApps, this one’s for you!
🤔 What is a SharePoint List Calculated Column?
A calculated column in SharePoint Lists allows you to automatically generate values based on other columns using formulas—similar to Excel. You can perform operations on text, dates, and numbers to transform or derive data without manual input.
When working with text values, three of the most useful formulas are:
✔️ LEFT(): Extracts a specified number of characters from the beginning of a text string. This is often referred to as the SharePoint List calculated column LEFT function. ✔️ RIGHT(): Extracts a specified number of characters from the end of a text string. ✔️ MID(): Extracts a specific portion of text from the middle of a string, based on a starting position and length. This is frequently used in SharePoint calculated column substring operations.
Let's look at how to add a calculated column to your list and then let’s look at how these work in real-world scenarios! 🚀
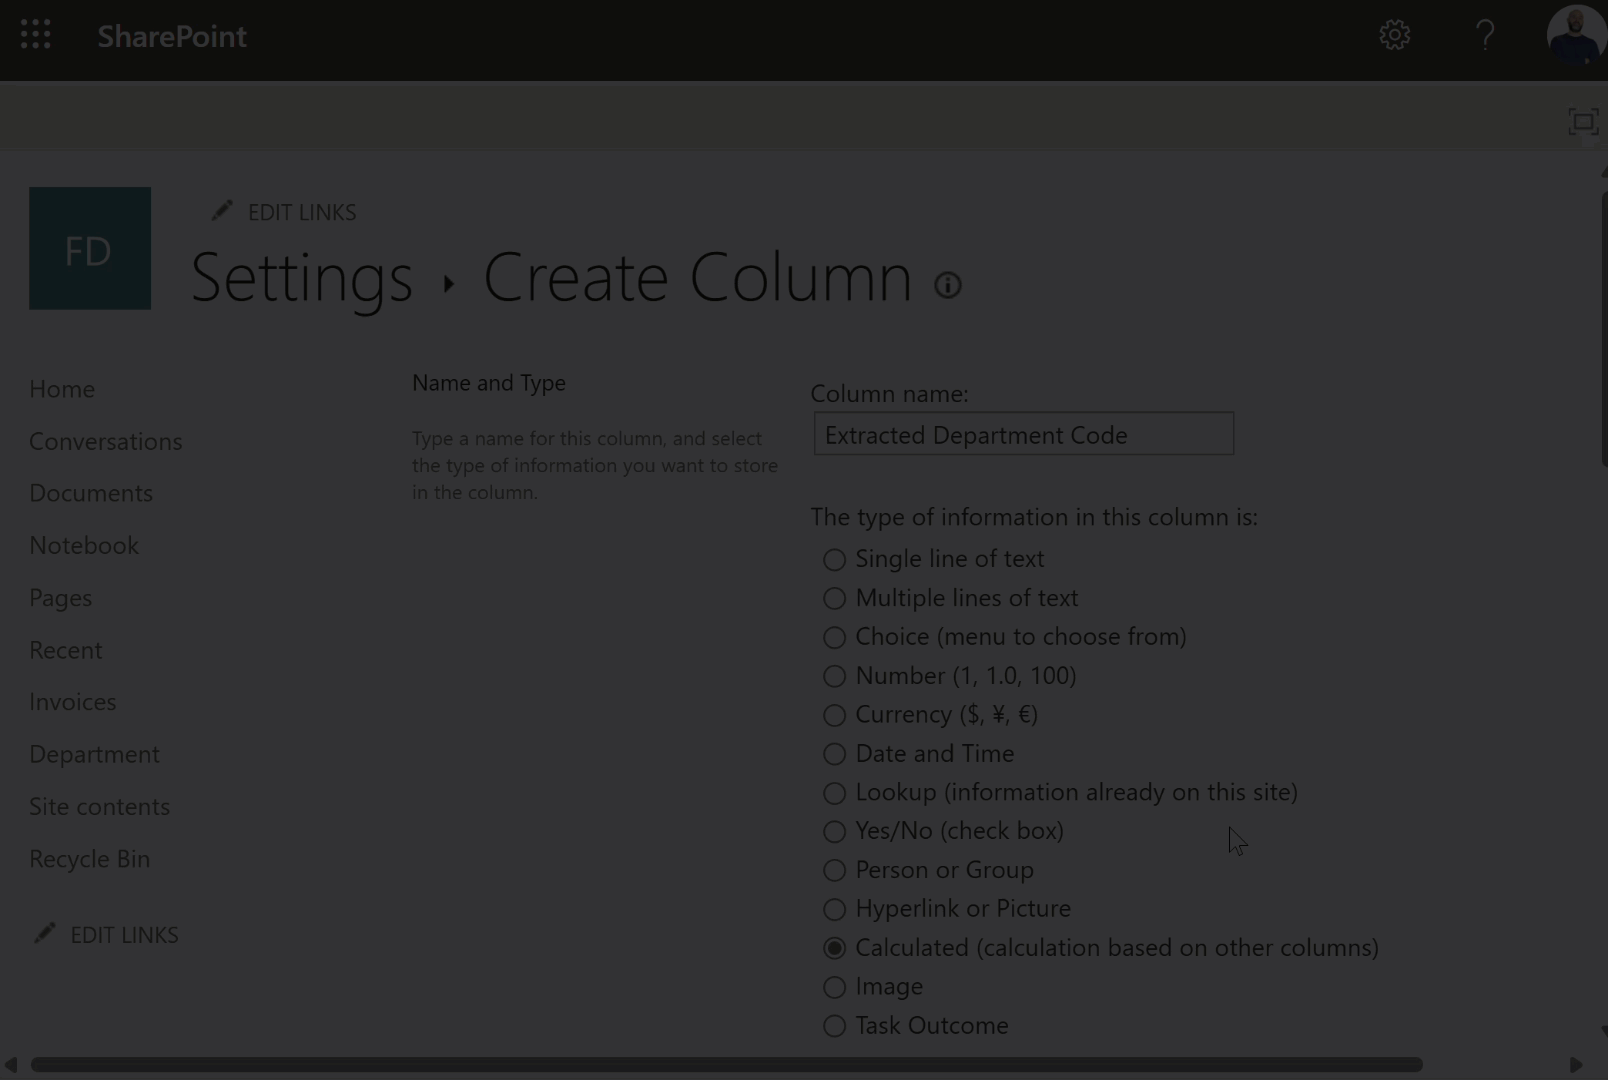
🛠️ How to Add a SharePoint List Calculated Column
To create a calculated column on a SharePoint List, follow these steps:
-
Click on the "Add column" button in your list.
-
Click on "See all column types" and then click "Next."
-
Give your column a name.
-
Select "Calculated (calculation based on other columns)."
-
Enter a formula as demonstrated below and click "OK."
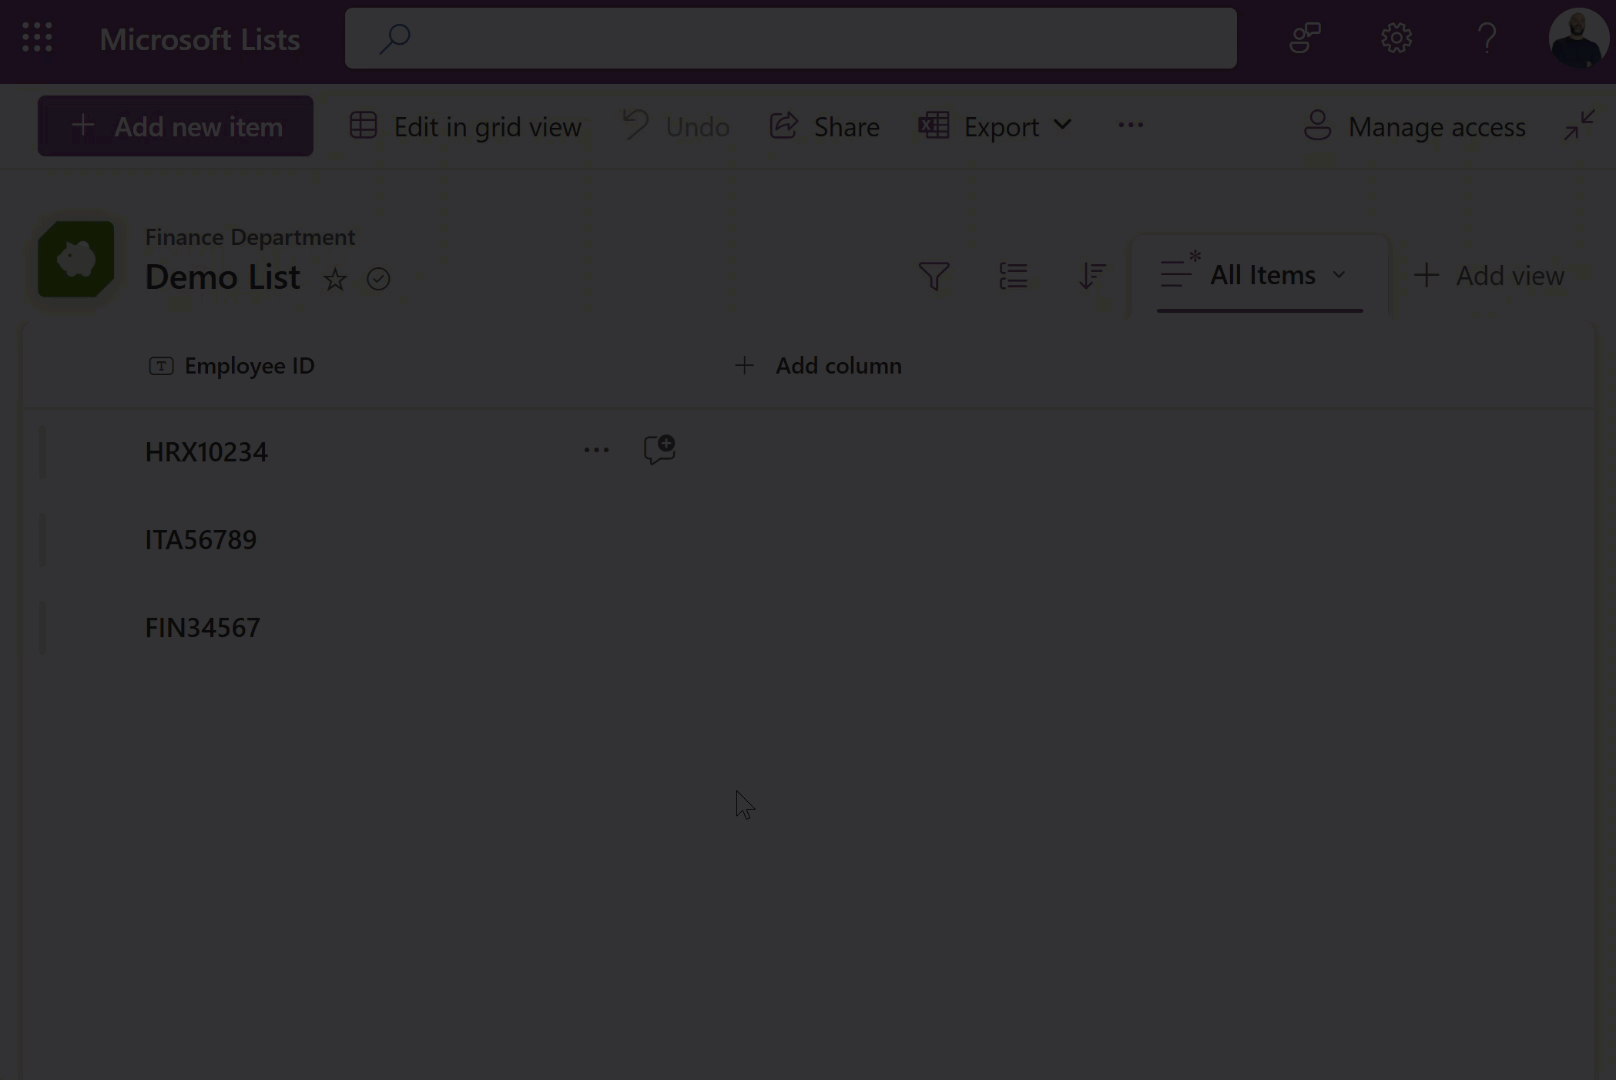
✂️ Example 1: Using LEFT() to Extract a Department Code
Say you have an Employee ID column where the first three characters represent the department code, like this:

You can create a calculated column with this formula:
=LEFT([Employee ID],3)
This formula takes the first 3 characters from the Employee ID. This is an example of how to use the LEFT function in a SharePoint calculated column to extract relevant text values.
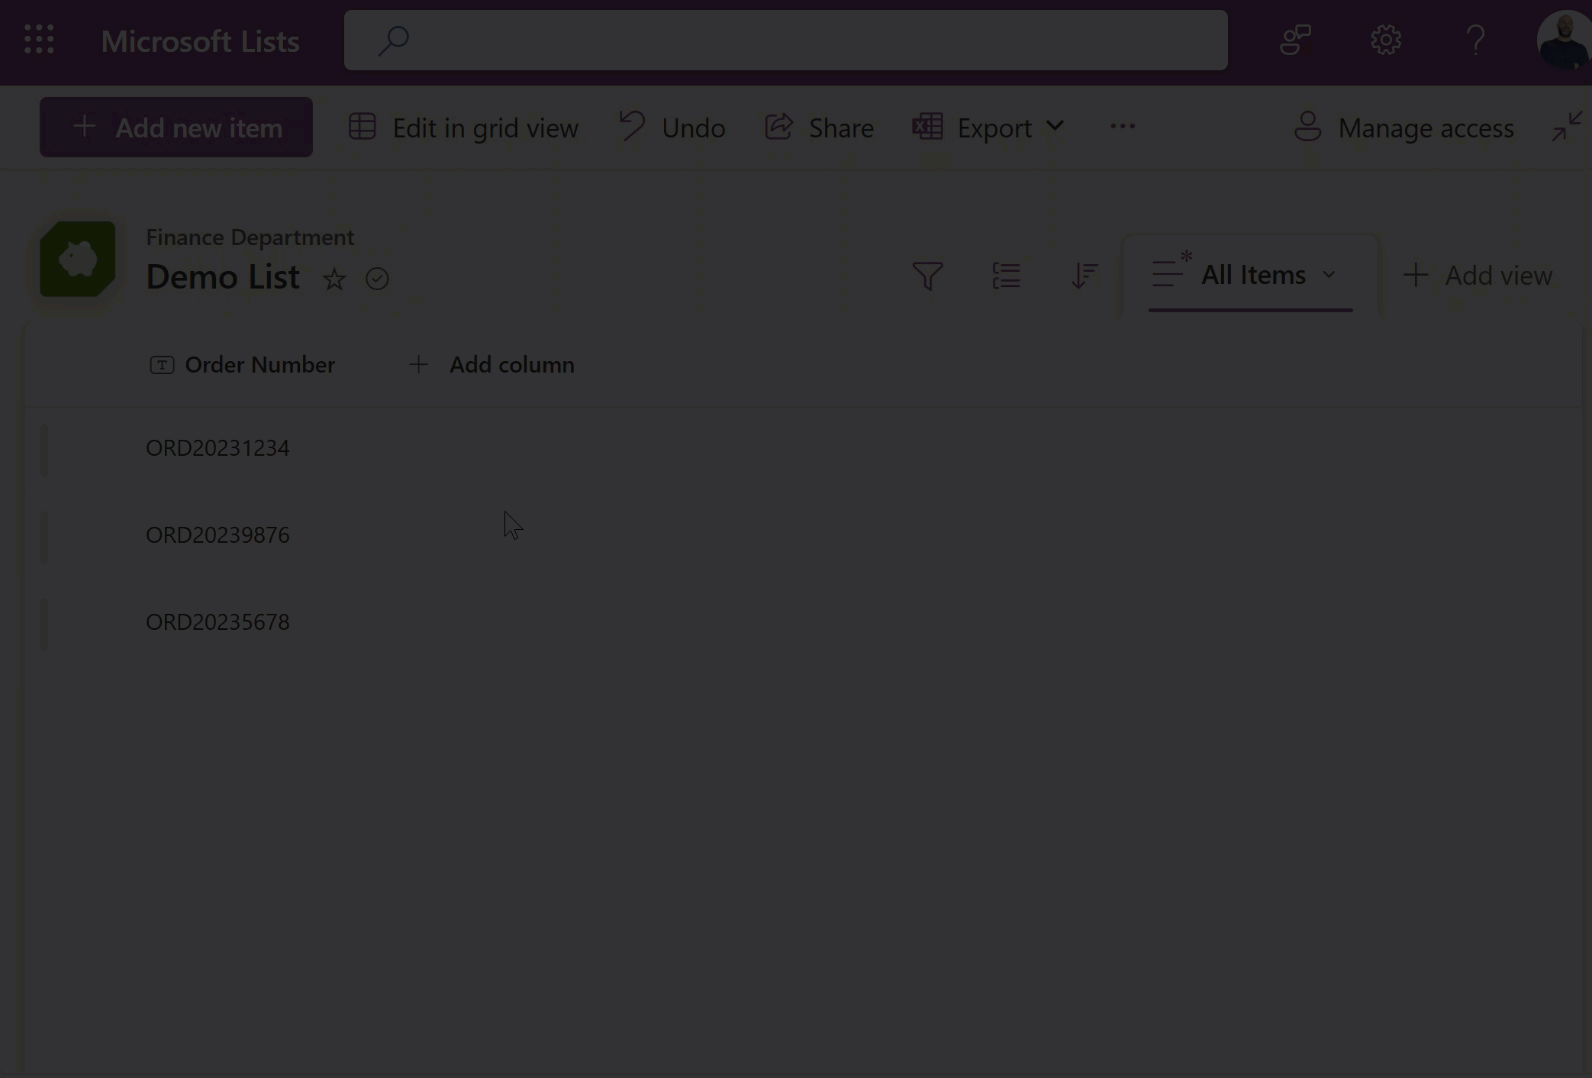
🔍 Example 2: Using RIGHT() to Extract Last Four Digits of an Order Number
Let’s say you have an Order Number column where the last four digits represent a unique identifier. You want to create a new column that only shows those last four digits.

Here’s the calculated column formula:
=RIGHT([Order Number],4)
This formula extracts the last 4 characters from the Order Number.
🎯 Example 3: Using MID() to Extract a Project Code from a Naming Convention
Imagine you have a Project Name column with a standard naming convention as outlined in the image below.

If the project code is always between the 7th and 12th character, you can use this formula:
=MID([Project Name],7,6)
This formula starts at the 7th character and extracts the next 6 characters to get the project code. This method is commonly used in SharePoint calculated column MID functions to retrieve substring values.

PS: If you want to learn more about these formulas, be sure to check out this video! 📺
Final Thoughts
Calculated columns can save you tons of time when working with structured data in SharePoint Lists—no Power Automate needed!
I’d love to hear your thoughts:
📩 Are you using calculated columns in SharePoint Lists? 📩 Have you tried using LEFT(), RIGHT(), or MID() before? 📩 What other formulas would you like me to cover?
Hit reply and let me know! 🚀
Enjoyed This Content?
If you found this content helpful, consider showing your support by Buying Me a Coffee. Your generosity helps cover the costs of the tools and services I use to create valuable content and keep it coming your way. Thank you for your support!
Got Questions or Ideas? Let's Connect!
Are you facing a challenge with a Microsoft 365 app? Have a tutorial idea you'd like to see covered? Or perhaps you're looking for personalized coaching and guidance to make the most of Microsoft 365? If so, just hit the reply button and get in touch—I’d love to hear from you! Your feedback and ideas help shape the content I create, ensuring it’s tailored to your needs. Let's work together to boost your productivity and tech skills!
Looking for a Previous Tip? 🔎
Did you know? You can quickly find all past editions of the 🧭Microsoft 365 Compass🧭 newsletter in one place! Just visit this section on my website — no need to dig through your inbox. Catch up on tips, tricks, and tutorials anytime! 🚀


Responses