The PowerPoint Add-In That Saves Me Hours (Seriously)
If you’ve ever had to build project visuals or timelines in PowerPoint, you know how time-consuming and tedious it can be—especially when dates shift and stakeholders want “just one more update.” In this edition of 🧭Microsoft 365 Compass🧭, I’m sharing a tool that’s completely transformed the way I create and manage project visuals. It’s called Office Timeline, and I genuinely wish I had discovered it earlier in my career as a consultant and project manager. This PowerPoint add-in lets you turn your data into clean, professional Gantt charts and timelines—right inside PowerPoint. No clunky interfaces. No starting from scratch. Just fast, clear visuals that help you tell the story of your project with confidence.
You can sign up and start using it for free—and even test out the Expert Edition, which includes powerful features like importing from a spreadsheet, free for 14 days using my special referral link.
Affiliate disclaimer: If you choose to upgrade, I may earn a small commission—at no extra cost to you. These help support the content I create.
What Is Office Timeline?
Office Timeline is a PowerPoint add-in that you can download to quickly create project timelines and Gantt charts—without ever leaving PowerPoint. It works right inside the tool you already use, making it easy to turn your data into clean, professional visuals in minutes. You can start from scratch or import a spreadsheet, group tasks into swimlanes, and drag and drop to update dates as your project evolves.
Create a Gantt Chart in PowerPoint in Just a Few Clicks
To create a Gantt Chart in Microsoft PowerPoint in minutes follow the steps below:
-
Download and install the Office Timeline PowerPoint add-in. It only takes a few minutes and setup is simple.
-
Open your PowerPoint file and click on the Office Timeline or Office Timeline Expert tab in the ribbon.
-
Click the New button to start building your timeline.
-
To use a pre-designed layout, click From Template and choose a timeline template that suits your project.

-
In this example, I’ll create my Gantt chart by importing a simple spreadsheet that contains all the required data. To do this, click Import Data, then browse and select your Excel file.
-
Specify which row in your spreadsheet contains the column headers, then click Next.
-
Map your spreadsheet columns to the appropriate timeline fields. Office Timeline will automatically analyze your data and attempt to match the columns for you. In this example, I used a prebuilt Exel template from Office Timeline, which made the process even smoother.

- Finally, select the rows you want to import—in this case, I’m selecting all—and click Import. Just like that, a professional-looking Gantt chart is generated without the need to manually adjust icons or shapes in PowerPoint.

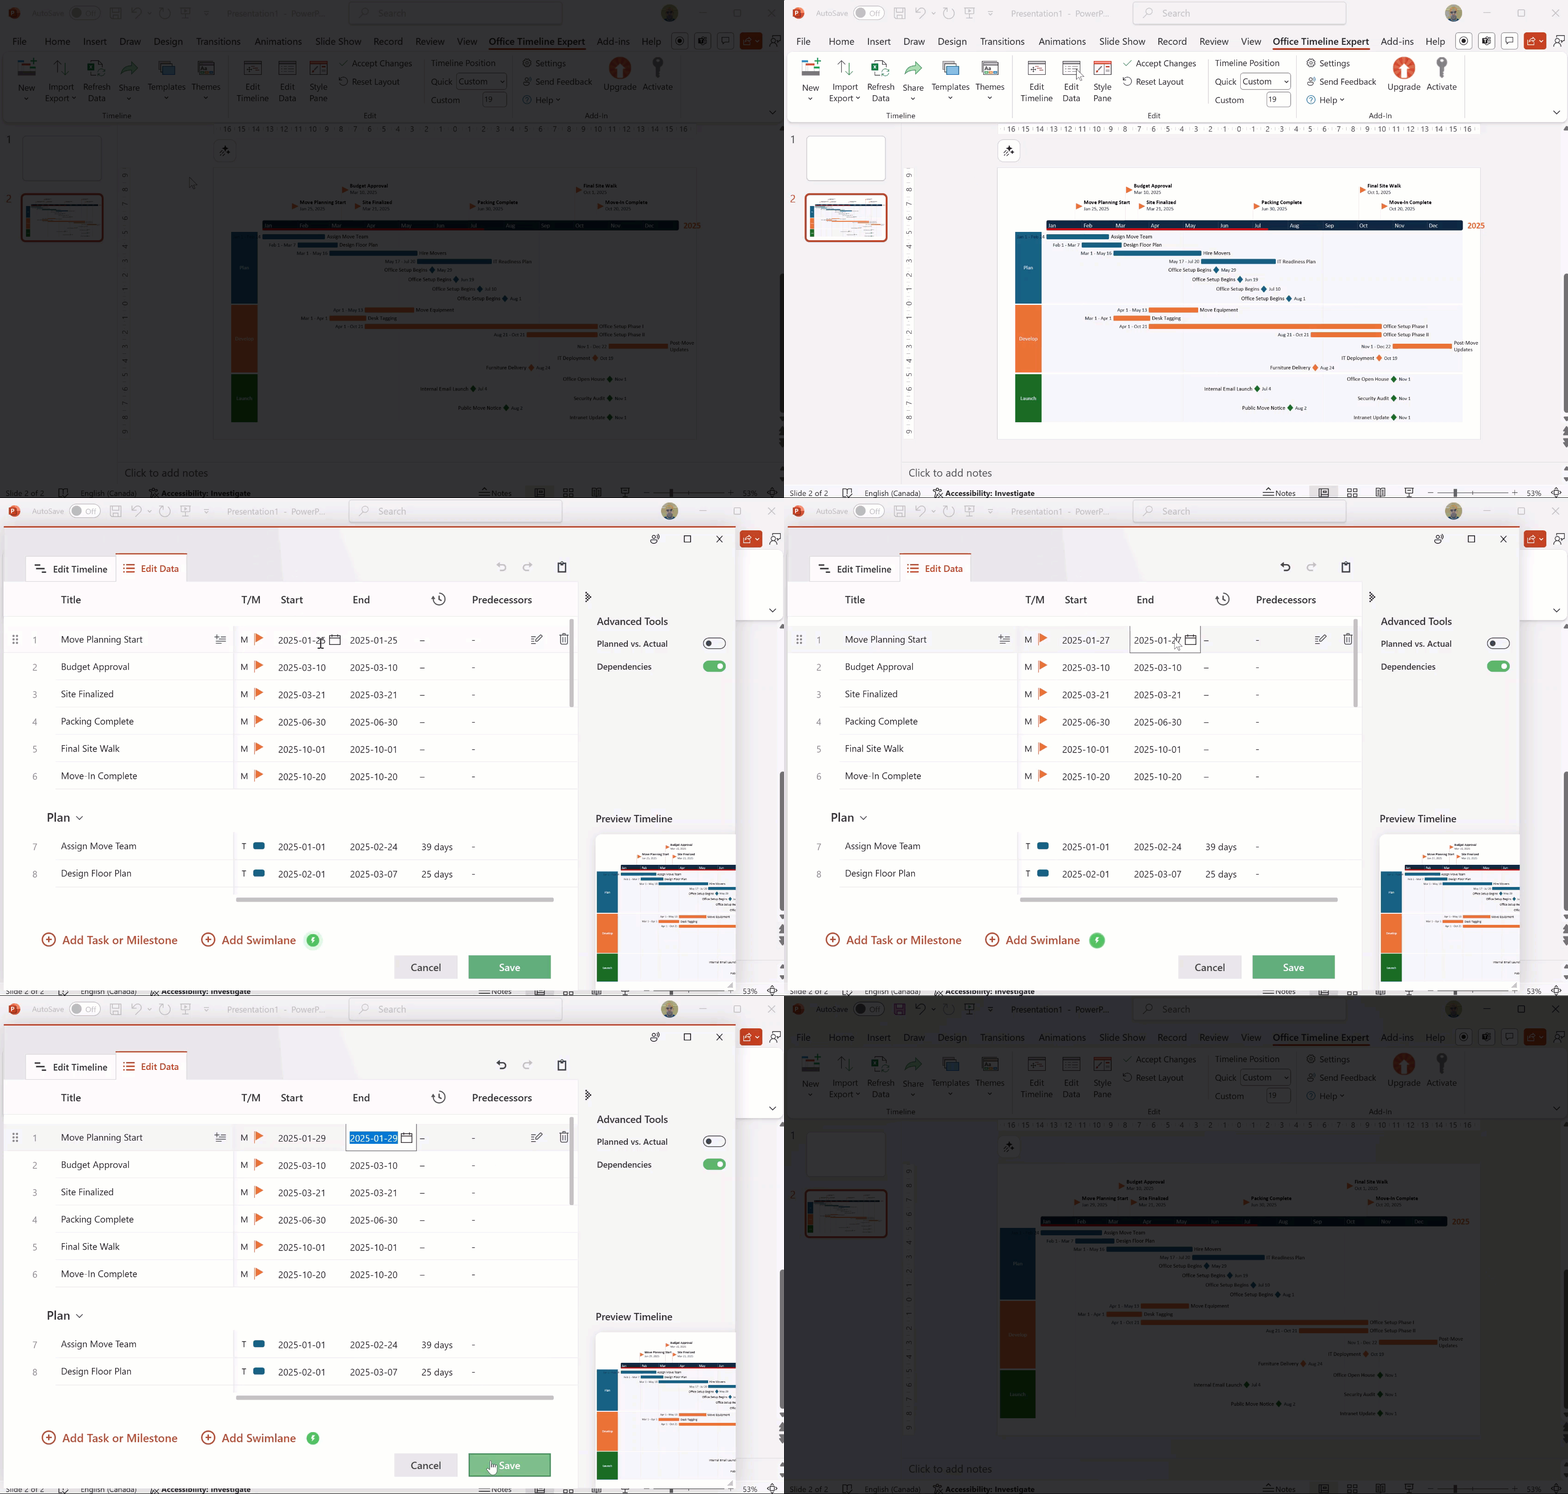
What makes Office Timeline even more powerful is its ability to keep your visuals up to date. When your project data changes, simply click into the edit data menu, update the data, and the chart elements will automatically adjust and snap into place—no more wasting time with SmartArt or manual formatting.

🧠 Final Thoughts
If you regularly build project visuals, timelines, or Gantt charts in PowerPoint, Office Timeline is a huge time-saver—and one of those tools that just makes your workflow smoother. I’ve found it especially helpful for executive updates and stakeholder presentations where clarity and polish matter. If you're curious to try it out, you can sign up for free using my referral link.
👉 Have you tried Office Timeline before?
👉 Want me to create a full walkthrough video?
👉 Got another PowerPoint or Microsoft 365 tool you'd like me to explore?
Hit reply and let me know—I read every message and your input helps shape future editions!
Enjoyed This Content?
If you found this content helpful, consider showing your support by Buying Me a Coffee. Your generosity helps cover the costs of the tools and services I use to create valuable content and keep it coming your way. Thank you for your support!
Got Questions or Ideas? Let's Connect!
Are you facing a challenge with a Microsoft 365 app? Have a tutorial idea you'd like to see covered? Or perhaps you're looking for personalized coaching and guidance to make the most of Microsoft 365? If so, just hit the reply button and get in touch—I’d love to hear from you! Your feedback and ideas help shape the content I create, ensuring it’s tailored to your needs. Let's work together to boost your productivity and tech skills!
Looking for a Previous Tip? 🔎
Did you know? You can quickly find all past editions of the 🧭Microsoft 365 Compass🧭 newsletter in one place! Just visit this section on my website — no need to dig through your inbox. Catch up on tips, tricks, and tutorials anytime! 🚀


Responses